Tuesday, March 5, 2019
Metallica - "Nothing Else Matters" Live - Wichita, KS 03/04/2019
Sold out show was amazing. Such talented musicians. Metallica rocked Intrust Arena.
Tuesday, October 30, 2018
Textured Fingerless Mitts

Stitches used and abbreviations
Chain Stitch ch
Back Loop bl
Single Crochet sc
Treble Crochet tr
Size One Size Fits All - To increase size to a larger mitt use larger needle or increase rows by -suggest trying H or larger yarn
Pattern notes:
- Easy to make-substitute x-stitch using a treble crochet.
- Looks great in solids and prints.
- Red Heart Super Saver yarn yields a slightly larger mitt but still one size fits all.
- Using larger hook still makes a beautiful mitt and the same overall effect.
- Thumb is adjustable for different sizes by increase or decrease in number of skipped stitches - row 1.
- Do not count turning chain(s). Counting each row should give great results.
- Crossed over treble crochet instructions:
- Lovely Crochet video demonstrated by Yanina Pictured instructions using dbl instead of trb crochet from Dummies.com
Directions: Make 2
Make a slip stitch. Chain 39
- In 4th chain from hook tr. Tr in next 7 ch. Ch 5. Sk 5ch, Tr in next 23 ch Turn. (31 tr, 5 ch sp)
- Ch 1, sc in 23tr, sc in next 5 ch, sc in 8 tr. Turn. (36 sc)
- Ch 1, sc in bl of each sc. Turn. (36 bl sc)
- Repeat row 3 three times.
- Ch 3, tr in sc, sk sc, tr in next sc, tr behind in sk sc bl or 2nd sc from beginning making the x stitch, sk 1 sc, *[tr in next sc bl, go back to sk sc tr behind in sc bl] repeat *[ ] 17, tr in lasc sc bl. Turn. (36 tr in sc bl) See pattern notes for help on the x stitch.
- Ch 1, sc in each tr. Turn. (36 sc)
- Ch 1, sc in bl of each sc. Turn. (36 bl sc)
- Repeat row 7 - 3 times.
- Repeat 5-7 - 3 times - until 30 rows are completed.
- Join with sl st in each beg ch and bl sc of last row by flipping beginning rows up towards the front going down the side in all 36 sc. Reinforce around thumb space with ch 1 sl where beginning ch meets ch 5 of row 1.
- Finish with 40 evenly spaced sc on the right side of the mitt on both top and bottom, then a sl st in each sc, finish off.
Other patterns created by Prairie Girl Treasure


Fingerless Mitts Lace baby crown Woolie Socks

Fingerless Mitts Lace baby crown Woolie Socks

Saturday, July 7, 2018
Tuesday, July 5, 2016
Rippling Crochet Slipper Socks Pattern
 |
| Rippling Slipper Socks Crochet Pattern |
Scrappy Project for comfy toes: Crochet ripple stitch low ankle socks to use up all kinds of leftover little balls of yarn and make a colorful pair of bootie style socks for Women's size 8-10. I've used Red Heart Supersaver yarn for this but you can use any size 4 yarn in acrylic or wool. These work up very quickly with a H size hook (5mm) and use up scrap colors from your leftover yarn from other projects in a fun way with limitless options.
PDF Pattern available on Raverly.com Rippling Slipper Socks for $2.50.

Sunday, May 1, 2016
Crochet Summer Halter Dress Pattern
 |
| Summer Halter Dress |
Visit Ravelry
To purchase click

Thursday, April 21, 2016
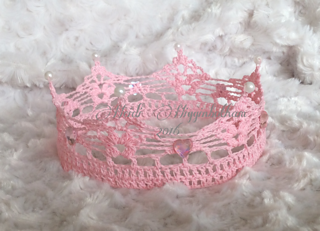
Crochet Lace Princess Crown Pattern


Thursday, March 17, 2016
Drops 132-2 Wildflower Crochet Jacket

It's found below.
http://www.garnstudio.com/pattern.php?id=5275&cid=17
The pattern works up fairly easy and very quickly for a sweater. Time spent approximately 15 hours. Most of the stitches are treble crochet. I would recommend self striping yarn over varigated yarn if working towards a multi color effect. The yarn I used was Lion Brand Landscapes in the Mountain Range Color way. A word to the wise, don't use too much tension on the fibers of this yarn as its a roving, it'll tear in two. I love the feel of it though so it was completely worth my frustration over yarn choice and just look at the results.

Wednesday, March 2, 2016
Free Crochet Hair Tie - Super Cute Ruffled Scrunchie
Needed:

Hair rubberband
Colorful yarn left overs (I'm using a sock weight)
Your favorite crochet hook. (Mine is G or 4.0 mm
Crochet in the round.
Slip stitch to rubber band.
Rd1. Sc around and even number of stitches and slip stitch to first sc.
Rd2. Ch 2, dc in front loop of each sc around of 1st Rd.
Rd3. (Ch3, sc in front loop) repeat () around. Slip stitch in 1st ch of ch3.
Rd4. (Ch3, sc in back loop of round 2) repeat () around. (You can slip stitch here, but you may need ch2 for next round)
Rd5. Dc in back loop of each sc around of 1st Rd. Slip Stitch to 1st dc.
Rd6 & Rd7. Repeat Rd3 and Rd4. Finish off and wear!
Tuesday, November 10, 2015
Fleece Lined Fingerless Mittens for Emmy
I have seen these fingerless mittens in catalogs and stores, I love them. So, here's my rendition.


Emmy's Motif
Material: Any sock weight yarn, Size G hook (4.00mm)
Motif Size: Just under 2 inches.
Special Stitch: Puff Stitch (PS)
Yo, insert hook in indicated st, yo, pull lp through st and make lp same height as previous sts in working row, (yo, insert hook in same st, yo, pull lp through st and make lp same height as working row) twice, yo, pull through all 7 lps on hook, ch 1.
Directions:
Ch 4, join circle with slip
stitch
Round 1: Ch 1, 12 sc in ch 4
circle. Join with slip stitch. (12 sc)
Round 2: Ch 3, 1 ps in each
sc. Join with slip stitch (12 ps)
Round 3: Ch1, * sc in next ps,
ch 1 twice; sc in next ps, ps twice in next ch 1 space *; repeat from *to*
three more times. Slip stitch to beginning ch 1. Weave in ends.
Make a total of 32.

Assembly:
Join together 16 motifs for each hand, leaving space for the thumb opening. & join the motifs in 4 columns of 4, I'm using method 2 for squares finished with chain joined in a zig zag pattern shown on this tutorial by pulling the yarn through the back after making a single crochet between joins. Any method for joining is going to work as long as you aim for a finished size of 7 1/2 x 7 1/2 for your crocheted piece. This shows 12 joined and the thumb space.


Round 1-ch 1, sc in same stitch, according around, join with slip stitch (20 sc)
Round 2-ch 3 (counts as dc) decrease dc, 5 dc, decrease dc twice, 5 dc, decrease dc, dc. Slip stitch to chain 3
Round 3-ch 3 (counts as dc), decrease dc, 10 dc, decrease dc. Slip stitch to join.
Round 4-ch 3 (counts as dc), 13 dc around, join with slip stitch.
Round 5- Repeat round 4 and fasten off. Weave in ends.
Cut fleece 7 3/4" x 7 3/4", allowing for a 1/4 seam allowance. Hem top and bottom 1/4" and sew the side for seam. Turn fingerless mitts inside out. Align with fingerless mittens and mark thumb opening, and cut a slit slightly larger than the thumb opening. Sew fingerless mitten and fleece lining together with thread or yarn at top, bottom and thumb opening. Finish assembly by joining outer seam and weaving in the ends.
Finishing:
1 round of single crochet at the top, 1 round of double crochet and 1 round of single crochet at the bottom.
Saturday, September 19, 2015

Thursday, September 17, 2015
I won
I can't believe it. The Kansas State Fair is highly competitive in the quilt and needle arts. I'm thrilled at third place. 
Wednesday, August 5, 2015
Fair Entry
Prize winning crochet is something to be proud of. The hours of time spent on this handwork is up to the individual. A lot of planning went into this contender.

The pattern comes from a vintage design, and the thread used is JP. Coats mercerized cotton sewing machine thread. Three strands are held together. The color combinations are endless using thread.
I learned about this technique through Crochet Mastering. It's tedious but worth it.
Some helpful hints I have heard from judges and observations I've made from handwork judging for your handwork
1. Make sure it is clean-wash before entering to remove odors and hair. Judges will notice it.
2. Block your work after washing. I've seen work submitted without blocking and sometimes the shaping is lacking the finishing touch that comes with blocking. I do not use pins, I monitor the piece as it dries, shaping it how it looks best. Usually I check it every couple hours.
3. Make sure all your thread or yarn ends are woven in and/or clipped.
4. If you make a mistake fix it!
5. It's up to the judge, make your project say wow in color and or design, blingy, or other embellishment such as buttons, ribbon, flowers. Presentation is also important for doilies some sort of backboard helps.
6. Some comments can be used towards improvement or correction you've missed-no one is more perfect than God.
Good luck
Monday, April 20, 2015
Morels in Spring

We tried along the edge of a pasture but got rained out. I did find bird feathers I had never seen from a Northern Flicker. It was easily identifiable by it's orange shaft. Later we found feathers with a yellow shaft which was also a Northern Flicker, which is part of the woodpecker family.
Friday, February 13, 2015
Thursday, February 12, 2015
Crochet Bib Necklace
Critique it!
I worked up this necklace out of washers and thread. It's really very easy to make even though there is no set pattern to create it. I used size 10 thread and plumbing washers (for the sink). I went around each washer a number of times to cover it, then hand stitched the rings together. This makes a nice statement necklace for only a few bucks. |
| Crochet necklace |
Learning about crochet techniques | Painted Crochet
Combing the internet looking for new and old crochet patterns has always been a passion. I look at patterns everyday. The search for patterns leads me to find new techniques to try. Pinterest.com is fascinating since patterns can be found from all over the world. Russian, Japanese and South American pattern diagrams are pretty similar to the ones I have crocheted over the years. Here's my link to many patterns, I hope you like them. I've assembled a growing collection https://www.pinterest.com/whosedadt34/crochet/
Have you ever thought about painted crochet? Have you ever used vintage tatting thread to crochet? My newest project is a combination of both. I am making a doily using sewing and tatting thread for my newest project. I can barely wait to show it off! Lots of patience is required for painted crochet.
Painted crochet uses multiple threads combined to form shades of color. Shades of red and pink were used as follows: Initially, three pieces of red thread were held together. When I was ready to begin changing over to pink, I dropped 1 red strand and added in a pink one, so there were two red and one pink. In following rounds of the crochet doily I dropped another red thread and added a pink one, for 1 red and 2 pink threads. The final transition to pink was worked using three pink threads. To make things more interesting, I used three different shades of pink for a varigated look.
It's important to make sure the thread being used is the same material and size. I have tried using different types and sizes of thread and one thing stuck out-texture. Major texture differences existed with using different thread types and sizes.
One of the biggest obstacles to this method of crochet is correcting mistakes. It gets tricky especially if thread is cut after the round and you wind up needing more. Believe me, no one wants a bunch of tiny knots tied together in your work. Knots are difficult to hide. Leaving a longer tail and then weaving in the tail when the crochet is finished is advisable to overcome this obstacle. Also, knotting occurred when undoing my work. I had to be especially careful with the unwound thread. I tried rewinding which resulted in a tedious mess to take knots out of. My best case was to leave the thread loosely in a dish and begin reworking my project, slowly bringing thread towards the work.
 |
| Painted crochet doily |
Painted crochet uses multiple threads combined to form shades of color. Shades of red and pink were used as follows: Initially, three pieces of red thread were held together. When I was ready to begin changing over to pink, I dropped 1 red strand and added in a pink one, so there were two red and one pink. In following rounds of the crochet doily I dropped another red thread and added a pink one, for 1 red and 2 pink threads. The final transition to pink was worked using three pink threads. To make things more interesting, I used three different shades of pink for a varigated look.
It's important to make sure the thread being used is the same material and size. I have tried using different types and sizes of thread and one thing stuck out-texture. Major texture differences existed with using different thread types and sizes.
One of the biggest obstacles to this method of crochet is correcting mistakes. It gets tricky especially if thread is cut after the round and you wind up needing more. Believe me, no one wants a bunch of tiny knots tied together in your work. Knots are difficult to hide. Leaving a longer tail and then weaving in the tail when the crochet is finished is advisable to overcome this obstacle. Also, knotting occurred when undoing my work. I had to be especially careful with the unwound thread. I tried rewinding which resulted in a tedious mess to take knots out of. My best case was to leave the thread loosely in a dish and begin reworking my project, slowly bringing thread towards the work.
Tuesday, September 2, 2014


Tuesday, April 8, 2014
How to make a treasury on Etsy
 |
| 1st Screenshot |
From this screen you will notice down the center a place to click next to the words Treasury List > See More, you click on it.
 |
| 2nd Screenshot |
Next look to the right column under Curator Tools and click on Create a List
 |
| 3rd Screenshot |
Look Up above on the first screenshot, to the right under my shop is a list of "Items I Love" Items I love are from other people's shop. Over the course of time, I have hearted them which results in the item going into my activity thread. Now I'm going to use them to make a treasury.
 |
| 4th Screenshot |
By hovering over the an individual item and right clicking, a menu pops up. Looking down the list, I hit copy link. Then I go back to the second page and put the copied link into the box that says listing URL (screenshot 3). Repeat this process 15 more times. Add a title, description and some tags, then save. And there you have it - How to make a treasury.
Tuesday, April 1, 2014
April Fools Day
The best April fool's prank you can play on a beef producer......give them chicks!

My fellow employees and I decided to play a little joke on the boss.
You should have seen the reaction. Oh wait, here's a picture.


He says he will never speak to me again, but I think he liked the prank.
The chicks are so cute and they will fit right in at the farm. The farm crew really yucked it up.
We couldn't stop laughing.
We couldn't stop laughing.
 |
| Happy Birthday Deanna |
Subscribe to:
Comments (Atom)