Showing posts with label Crochet. Show all posts

Tuesday, October 30, 2018

Textured Fingerless Mitts


Wear them while driving, at work or school, or so you can text. So has this every happened to you, this pattern just popped into my head. I love the fit and it's adjustable in every direction. I got lucky and they had this neat printed yarn locally and there you have it. Enjoy!


Stitches used and abbreviations Chain Stitch        ch Back Loop           bl Single Crochet    sc Treble Crochet    tr


02-easy_L.jpg Materials used
Deborah Norville-Everyday Prints-Toasted Marshmallow  - 1 skein Size F crochet hook or 3.75 mm Scissors Yarn needle
Size One Size Fits All  - To increase size to a larger mitt use larger needle or increase rows by -suggest trying H or larger yarn


Pattern notes:

  • Easy to make-substitute x-stitch using a treble crochet.
  • Looks great in solids and prints.
  • Red Heart Super Saver yarn yields a slightly larger mitt but still one size fits all.
  • Using larger hook still makes a beautiful mitt and the same overall effect.
  • Thumb is adjustable for different sizes by increase or decrease in number of skipped stitches - row 1.
  • Do not count turning chain(s). Counting each row should give great results.
  • Crossed over treble crochet instructions:

Directions: Make 2

Make a slip stitch. Chain 39
  1. In 4th chain from hook tr. Tr in next 7 ch. Ch 5. Sk 5ch, Tr in next 23 ch Turn. (31 tr, 5 ch sp)
  2. Ch 1, sc in 23tr, sc in next 5 ch, sc in 8 tr. Turn. (36 sc)
  3. Ch 1, sc in bl of each sc. Turn. (36 bl sc)
  4. Repeat row 3 three times.
  5. Ch 3, tr in sc, sk sc, tr in next sc, tr behind in sk sc  bl or 2nd sc from beginning making the x stitch, sk 1 sc, *[tr in next sc bl, go back to sk sc tr behind in sc bl] repeat *[ ] 17, tr in lasc sc bl. Turn. (36 tr in sc bl) See pattern notes for help on the x stitch.
  6. Ch 1, sc in each tr. Turn. (36 sc)                                               
  7. Ch 1, sc in bl of each sc. Turn. (36 bl sc)
  8. Repeat row 7 - 3 times.
  9. Repeat 5-7 - 3 times -  until 30 rows are completed.
  10. Join with sl st in each beg ch and bl sc of last row by flipping beginning rows up towards the front going down the side in all 36 sc. Reinforce around thumb space with ch 1 sl where beginning ch meets ch 5 of row 1.
  11. Finish with 40 evenly spaced sc on the right side of the mitt on both top and bottom, then a sl st in each sc, finish off.
Other patterns created by Prairie Girl Treasure
 Image result for oversized crochet sock
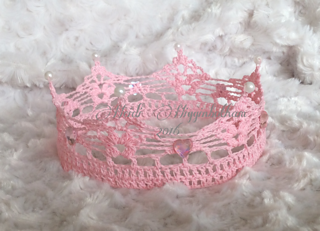
Fingerless Mitts                                     Lace baby crown                                 Woolie Socks

Sunday, May 1, 2016

Crochet Summer Halter Dress Pattern

Summer Halter Dress
 Little girls love to play dolls, I wish I had outgrown them. I've been obsessed with Barbie since I first played with them. I learned to make them clothes fairly young as well. My ideas have come from many young ladies making crochet festival tops and the v-stitch has become very popular these days as a crochet netting. This doll clothes pattern uses the same technique in the bust as the festival tops. The bust can also be converted into a cute bathing suit top by omitting the dress rows and making long straps across the bottom of the bust and finishing with the straps as written.  The netted crochet look uses the v-stitch and my pattern demonstrates how to increase v-stitches when working in the round. The materials needed are size 5 crochet thread and a #7 hook.


Visit Ravelry
To purchase click

Thursday, April 21, 2016

Crochet Lace Princess Crown Pattern

Today I'm giving away another free pattern to celebrate Queen Elizabeth's 90th Birthday.
I've posted it on Ravelry and all you need is the coupon code QE90BDAY to download it now FREE. Offer good April 21st, 2016 only. But just in case you miss this special offer, the Lace Princess Crown pattern will be available for an introductory price of $1.
This intermediate pattern works up fairly quickly and will fit sizes newborn to child. It can also be adjusted to fit an adult, youths or even the cat (by reducing the stitch count to 65 like I did with the yellow one on the right). I've also included some suggestion for decorating the crown. If you have any great ideas to decorate these, let me know.

Tuesday, November 10, 2015

Fleece Lined Fingerless Mittens for Emmy

I have seen these fingerless mittens in catalogs and stores, I love them. So, here's my rendition.


Emmy's Motif

Material: Any sock weight yarn, Size G hook (4.00mm)

Motif Size: Just under 2 inches. 

Special Stitch: Puff Stitch (PS)

Yo, insert hook in indicated st, yo, pull lp through st and make lp same height as previous sts in working row, (yo, insert hook in same st, yo, pull lp through st and make lp same height as working row) twice, yo, pull through all 7 lps on hook, ch 1.

Directions:

Ch 4, join circle with slip stitch
Round 1: Ch 1, 12 sc in ch 4 circle. Join with slip stitch. (12 sc)
Round 2: Ch 3, 1 ps in each sc. Join with slip stitch (12 ps)
Round 3: Ch1, * sc in next ps, ch 1 twice; sc in next ps, ps twice in next ch 1 space *; repeat from *to* three more times. Slip stitch to beginning ch 1.  Weave in ends.

Make a total of 32. 

Assembly: Join together 16 motifs for each hand, leaving space for the thumb opening. & join the motifs in 4 columns of 4, I'm using method 2 for squares finished with chain joined in a zig zag pattern shown on this tutorial by pulling the yarn through the back after making a single crochet between joins. Any method for joining is going to work as long as you aim for a finished size of 7 1/2 x 7 1/2 for your crocheted piece. This shows 12 joined and the thumb space.


Thumb

Round 1-ch 1, sc in same stitch, according around, join with slip stitch (20 sc)

Round 2-ch 3 (counts as dc) decrease dc, 5 dc, decrease dc twice, 5 dc, decrease dc, dc.  Slip stitch to chain 3

Round 3-ch 3 (counts as dc), decrease dc, 10 dc, decrease dc. Slip stitch to join. 

Round 4-ch 3 (counts as dc), 13 dc around, join with slip stitch.

Round 5- Repeat round 4 and fasten off. Weave in ends.


Cut fleece 7 3/4" x  7 3/4", allowing for a 1/4 seam allowance. Hem top and bottom 1/4" and sew the side for seam. Turn fingerless mitts inside out. Align with fingerless mittens and mark thumb opening, and cut a slit slightly larger than the thumb opening. Sew fingerless mitten and fleece lining together with thread or yarn at top, bottom and thumb opening. Finish assembly by joining outer seam and weaving in the ends.

Finishing:
1 round of single crochet at the top, 1 round of double crochet and 1 round of single crochet at the bottom. 

Thursday, September 17, 2015

I won

I can't believe it. The Kansas State Fair is highly competitive in the quilt and needle arts. I'm thrilled at third place. 

Wednesday, August 5, 2015

Fair Entry

Prize winning crochet is something to be proud of. The hours of time spent on this handwork is up to the individual. A lot of planning went into this contender.
The pattern comes from a vintage design, and the thread used is JP. Coats mercerized cotton sewing machine thread. Three strands are held together. The color combinations are endless using thread.

I learned about this technique through Crochet Mastering. It's tedious but worth it. 

Some helpful hints I have heard from judges and observations I've made from handwork judging for your handwork
1. Make sure it is clean-wash before entering to remove odors and hair. Judges will notice it.
2. Block your work after washing. I've seen work submitted without blocking and sometimes the shaping is lacking the finishing touch that comes with blocking. I do not use pins, I monitor the piece as it dries, shaping it how it looks best. Usually I check it every couple hours.
3. Make sure all your thread or yarn ends are woven in and/or clipped. 
4. If you make a mistake fix it!
5. It's up to the judge, make your project say wow in color and or design, blingy, or other embellishment such as buttons, ribbon, flowers. Presentation is also important for doilies some sort of backboard helps. 
6. Some comments can be used towards improvement or correction you've missed-no one is more perfect than God.

Good luck 


Thursday, February 12, 2015

Crochet Bib Necklace

Critique it!

I worked up this necklace out of washers and thread. It's really very easy to make even though there is no set pattern to create it. I used size 10 thread and plumbing washers (for the sink). I went around each washer a number of times to cover it, then hand stitched the rings together. This makes a nice statement necklace for only a few bucks.
Crochet necklace

Learning about crochet techniques | Painted Crochet

Combing the internet looking for new and old crochet patterns has always been a passion. I look at patterns everyday. The search for patterns leads me to find new techniques to try. Pinterest.com is fascinating since patterns can be found from all over the world. Russian, Japanese and South American pattern diagrams are pretty similar to the ones I have crocheted over the years.  Here's my link to many patterns, I hope you like them. I've assembled a growing collection https://www.pinterest.com/whosedadt34/crochet/


painted crochet doily
Painted crochet doily
Have you ever thought about painted crochet? Have you ever used vintage tatting thread to crochet? My newest project is a combination of both. I am making a doily using sewing and tatting thread for my newest project. I can barely wait to show it off! Lots of patience is required for painted crochet.

Painted crochet uses multiple threads combined to form shades of color.  Shades of red and pink were used as follows: Initially, three pieces of red thread were held together. When I was ready to begin changing over to pink, I dropped 1 red strand and added in a pink one, so there were two red and one pink. In following rounds of the crochet doily I dropped another red thread and added a pink one, for 1 red and 2 pink threads. The final transition to pink was worked using three pink threads. To make things more interesting, I used three different shades of pink for a varigated look.

It's important to make sure the thread being used is the same material and size. I have tried using different types and sizes of thread and one thing stuck out-texture. Major texture differences existed with using different thread types and sizes.

One of the biggest obstacles to this method of crochet is correcting mistakes. It gets tricky especially if thread is cut after the round and you wind up needing more. Believe me, no one wants a bunch of tiny knots tied together in your work. Knots are difficult to hide. Leaving a longer tail and then weaving in the tail when the crochet is finished is advisable to overcome this obstacle. Also, knotting occurred when undoing my work. I had to be especially careful with the unwound thread. I tried rewinding which resulted in a tedious mess to take knots out of. My best case was to leave the thread loosely in a dish and begin reworking my project, slowly bringing thread towards the work.


Thursday, January 16, 2014

Doris Chan Zodiac Sweater

I love this pattern. I think it's beautiful. Experimenting with different color, yarns, and hook sizes to see what I like best. I noticed on www.ravelry.com other crocheters have tempted to alter it for a larger size, but I'm trying to stick to the pattern so I can have one. My friend Trudy ;) bought the first one because it was too small for me. My boss wants one too. I'm using Red Heart I love this yarn before I move up to an alpaca or wool blend. The main reason behind using acrylic is availability. Anyways I have put the sweater
in my Etsy shop www.etsy.com

In order to make this sweater fit me, I had to go up to an I hook (chest 44). I love it!! I finally have one just like the one pictured. I wanted to use the same motifs as designed. I was worried it would come to my knees but the I hook worked wonderfully.


Tuesday, September 3, 2013

Drops Design - Circular jacket / sweater

Drops Design - Circular jacket / sweater

I love this pattern!


It's finally done! It's beautiful.
I didn't follow the pattern directions though. As much as I would love to spend $4.99 or more for a skein of yarn, I'm not going to. Especially for a pattern I have never tried or worn. Would you?  Here's what I did.

The actual pattern is available from Drops Design for free and the yarn costs $76.00. That's a lot of money to spend without trying it on first. I really like the looks of this sweater from the drape to the edging. It looks dressy and casual and airy. Here's the link to the pattern.
http://www.garnstudio.com/lang/us/pattern.php?id=3315&lang=us

My adaptation for the budget conscience, try it before you spend a small fortune minded friends, is below,

I found some yarn on sale $1.00 a skein for a medium weight 4-ply (1/2 off). I loved the lacy look of the original pattern, but when I searched to see what other's had come up with the sweater looked incredible using a thicker yarn. The original pattern had gauge numbers for so many inches per circle. So....using my cheaper yarn and my favorite crochet hook, I check to see how close it was. It came up a little bit off, but after looking at this pattern closely, it didn't matter. That's right! You really can use any hook and any size yarn for this project as long as you take your body measurements first.  You have to measure around the chest,  so the finished circle will end at approximately the same measurement. Next, we measured my back and arm hole size and jotted those numbers down. The main stitch throughout is a triple crochet so it goes very fast until you get close to being done. The ruffle seems like it takes forever and ever. The size needs to be correct for your body when you reach the arm holes and again when switching over to work on the sleeves. Easy adjustments can be made to create the perfect sweater for every body type. This is a very easy pattern for all experience levels.

I used 9-Premier yarns-Eversoft 3 oz skeins and a G6 hook(4mm) to obtain the closest gauge possible.

Just before adding the sleeves, I made sure it fit or else I would have added rounds or taken rounds away. It's really cute and I'm so excited that it looks cute on Grandma.  I believe I want to try the pattern again in the future with a lighter weight yarn as this was a 4 medium. The yarn I chose for making the first one isn't going to be the same, I'll probably try alpaca, cotton, or bamboo. As far as time goes, I worked between 14-20 hours to complete this sweater.


Migrating Snow Geese, Geary County, Kansas

Sunday, August 18, 2013

Crocheted Vintage Spider Web Pattern

Crochet HeadbandAfter the trigger finger diagnosis a week ago, I'm feeling much better. My hand is pain free due to the cortisone shot, my finger clicks a little, and has very little stiffness. If you have ever had your fingers getting stuck in weird positions the Dr. can fix it. I'm sure mine will be in good time.

So as therapy, before I start the quilting on my next project, I thought I would take it easy and get out old crochet patterns. I made a yoke but it will be awhile until I can go to town for material for the top. So onto the next project.

Next I filet crocheted a matching headband for the yoke (shown above). It has turned out pretty cute using simple stitches of single crochet, and by netting 3 times per row. It has been embellished with a rose slightly off center. A person could sell this stuff right? They would have to work faster than me! It took me about 2 hours to complete. So much for a $10.00 price point. Don't you think? Oh well another scrapped idea.


Spider Web Pattern
Using the spider web insertion for a cool headband gives this vintage design new life. After the first couple of motifs I realize what an easy pattern it is even though I never made it before. The center is a relief inside the filet. Any beginner could do it. Ok so this is the pattern I found in an old scrapbook. It's pretty tough reading. Surely there's many patterns already out there.

Google spider web insertion.....you get spider webs for Halloween. Not even my favorite vintage crochet website http://freevintagecrochet.com/ had it. Here are results from my search:


Spider Web Insertion

The work basket pattern in the above list works nicely. One motif measured just over two inches wide and two inches tall.
Stitches required:
Chain, Single crochet, Double crochet

Below are additional examples.


Vintage crochet yoke,  filet and spider web design
Example Close-Up (sold on Etsy)

Vintage Crochet Yoke (sold on Etsy)


Dawn's WISHLIST

Book for my Antique / Vintage Crochet Library
Emma Farnes My Book "G" c. 1915 Antique Spider Design Edgings, Insertions, Yokes & Corners

Search This Blog